Windows 11: How to Disable Automatic Windows updates
Published: Sep 27, 2023 11:27 PM

Sometimes you may have a need to disable automatic Windows updates on Windows 11, so we've provided you with 4 different methods to accomplish this task:
Method 1: Defer updates temporarily
This method is through the native Settings app and although it does not permanently disable updates, it can defer them for a time period up to 35 days. This is the recommended path by Microsoft to ensure your machine stays up-to-date on security patching and feature set.
1. Open the Settings app, select Windows Update from the navigation list on the left, or click here to directly open Windows Update settings.
2. You may click on the Pause for 1 week button to pause updating for 7 days, or select the drop-down arrow to defer updating for up to 5 weeks (or 35 days). If you choose Pause for 1 week, your options will then change and you can add additional time if you need to defer updating for a longer period.
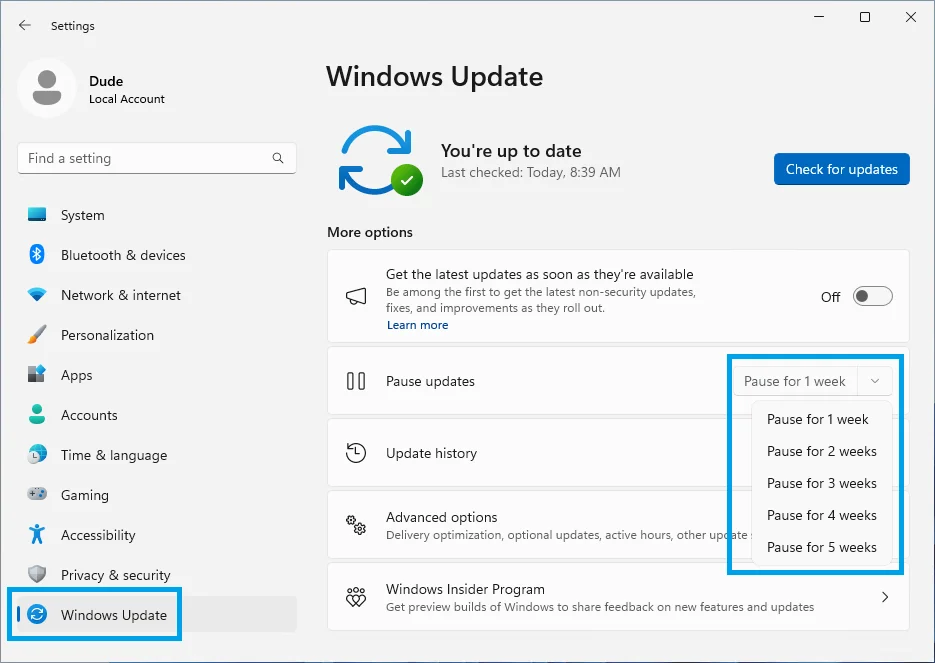
3. If needed, you can cancel the pausing of updates click on the Resume updates button in the top right corner of the Settings window.
Alternatively, if for some reason you want to permanently disable Windows updates from running, here are 3 additional methods on how to do that:
Method 2: Disable the Windows Update service
NOTE: You must have administrator rights to be able to disable services on your machine.
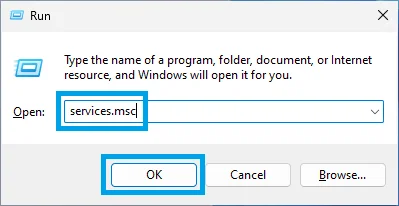
1. Press the Windows Key + R to open the Run dialog box. In the text field, type services.msc and hit Enter, or click on OK.
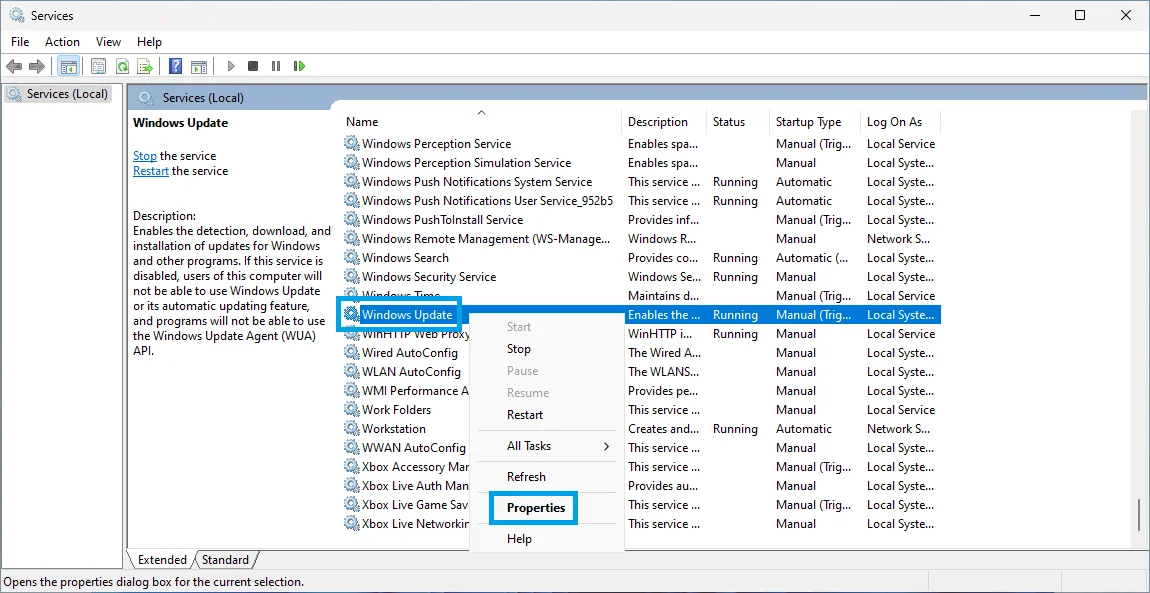
2. The Services window will open, and you'll want to scroll down to the Windows Update item in the list. Right-click on this item and choose Properties.
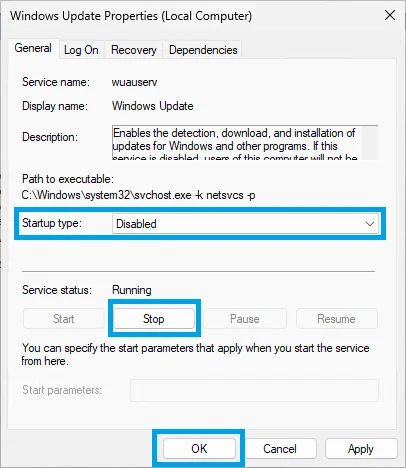
3. On the Properties window, change the dropdown under Startup type to Disabled to disable this service from starting up when the computer starts. You will also hit the Stop button to stop the service now, and hit OK to close the Properties window.
4. Close the Services window and the Windows Update service will no longer run on this machine until you re-enable it.
Method 3: Update local group policy
NOTE: Windows 11 Professional or Enterprise required - this will not work on Windows 11 Home Edition without further tweaking LINK. In addition, you must also be an administrator to modify local group policy.
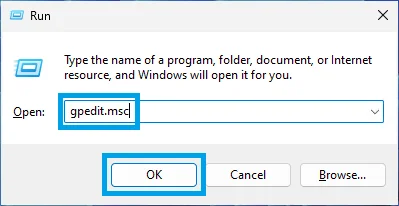
1. Press the Windows Key + R to open the Run dialog box. In the text field, type gpedit.msc and hit Enter, or click on OK.
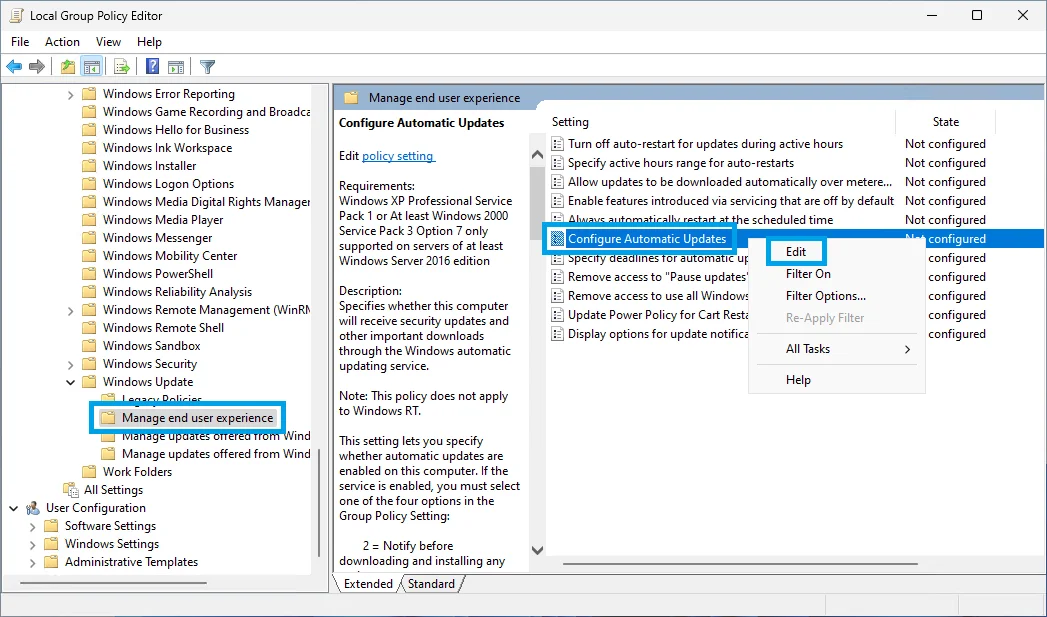
2. In the Local Group Policy Editor window, on the left-hand navigation pane go to Computer Configuration -> Expand Administrative Templates -> Expand Windows Components -> Expand Windows Update -> Click on the Manage end user experience folder.
3. In the right-hand pane, right-click on the item called Configure Automatic Updates and select Edit.
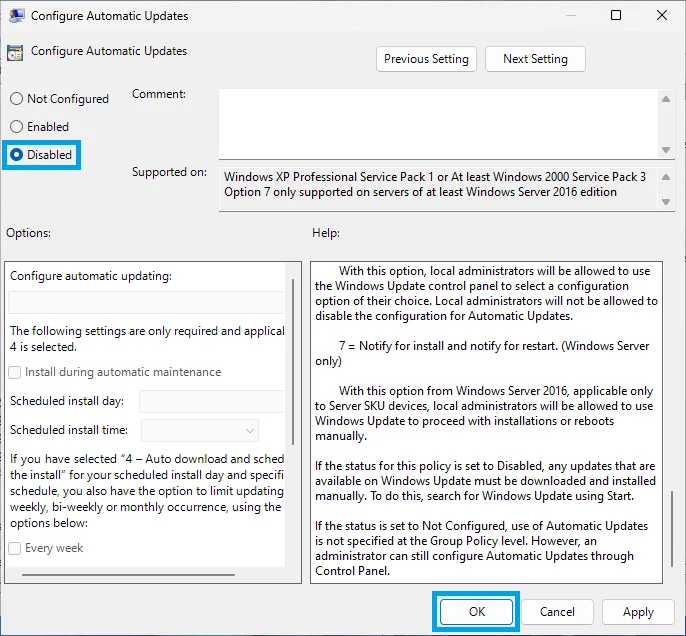
4. In the new window which opens, click the bubble on the left which says Disabled and hit OK.
5. Close the Local Group Policy Editor window.
6. You can now restart your computer for the changes to take effect!
-OR-
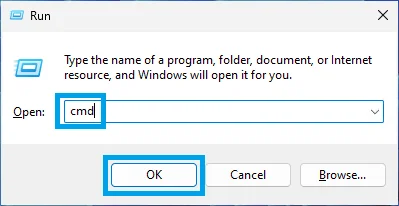
A. Open a new Command Prompt window by pressing Windows Key + R to open the Run dialog box. In the text field, type cmd and hit Enter, or click on OK.
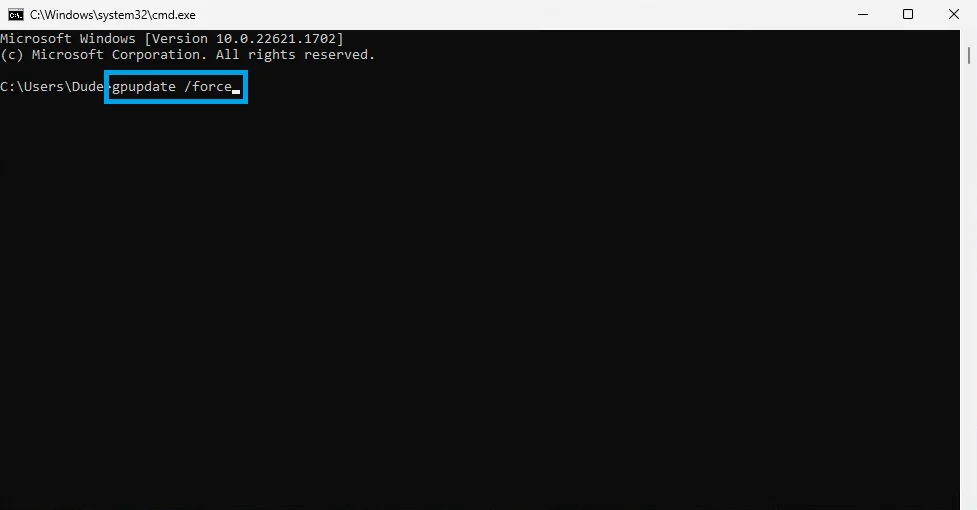
B. Type gpupdate /force and hit Enter. Wait for the policy update to finish, then you can close the window and you're done!
Method 4: Update/Create registry key (alternative to Method 3 for Windows 11 Home Edition users)
DISCLAIMER: Updating the registry improperly can cause system stability and performance issues. Take extra caution when modifying the registry if you are inexperienced, but don't be afraid of making mistakes if you blow up your computer because we all have done it. You will need administrator rights to be able to edit the registry.
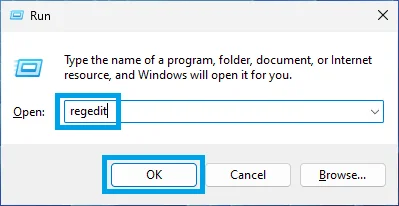
1. Press the Windows Key + R to open the Run dialog box. In the text field, type regedit and hit Enter, or click on OK.
2. In the window which opens, on the left-side you will Expand HKEY_LOCAL_MACHINE -> Expand SOFTWARE -> Expand Policies -> Expand Microsoft -> Expand Windows. Within the Windows expansion, you should see another sub-key named WindowsUpdate.
A. If you do not see WindowsUpdate then we will need to create it; however, if you do see WindowsUpdate then skip to Step 2: Part B.
1A. Right-click on the Windows key and select New -> Key. Name the key WindowsUpdate and hit Enter.

1B. Now right-click on the new WindowsUpdate key we just created and select New -> Key. Name the key AU and hit Enter.
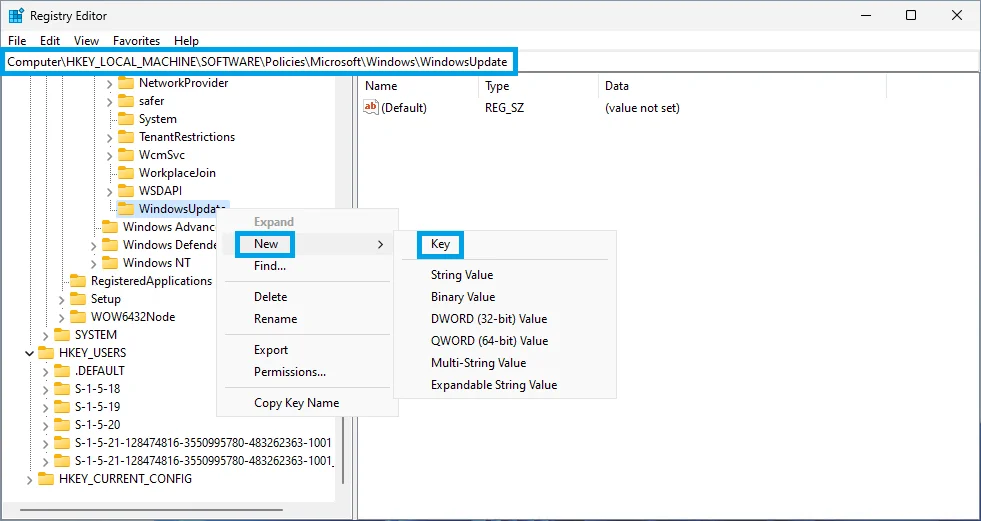
1C. Skip to Step 3.
B. If you do see WindowsUpdate then expand that key. Then expand AU within WindowsUpdate.
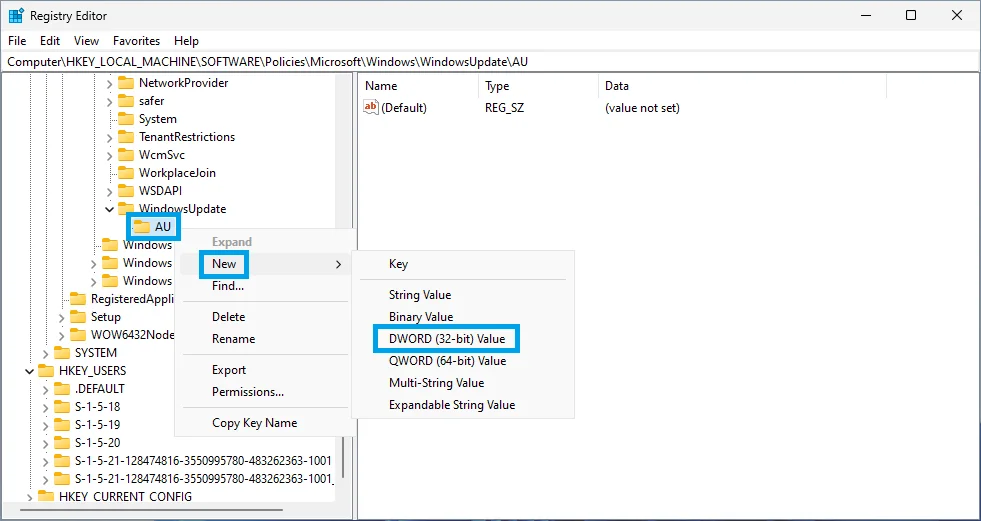
3. Right-click on the AU key we just created and select New -> DWORD (32-bit) Value. Name the value NoAutoUpdate and hit Enter.
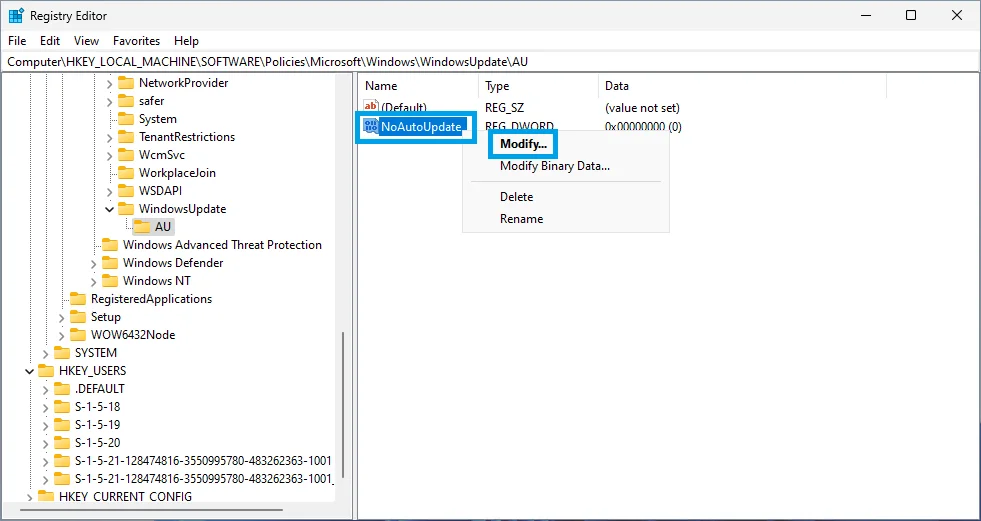
4. Right-click on the new NoAutoUpdate key and select Modify...
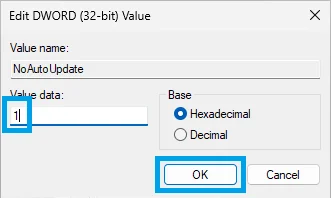
5. In the window which opens, change the Value data text field from 0 to 1 and hit OK.
6. Now you can close the Registry Editor, and then restart your machine for the changes to take effect.

